Remote networks can be easily bridged using WDS feature of MikroTik RouterOS™. We will show it for the case when the networks are connected through Atheros wireless interface. Using EoIP, this can be extended to any other type of interfaces, like PPTP and CISCO/Aironet. WDS works only on Prism and Atheros based cards.
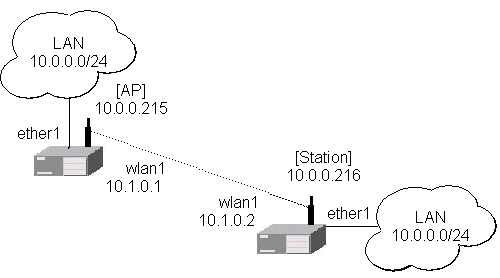
Let us assume the following network setup:
^^Please ignore the AP; Wlan; LAN ip, all of them is not been use in this setup, photo just for reference.^^
Follow the steps below to create transparent bridge using WDS:
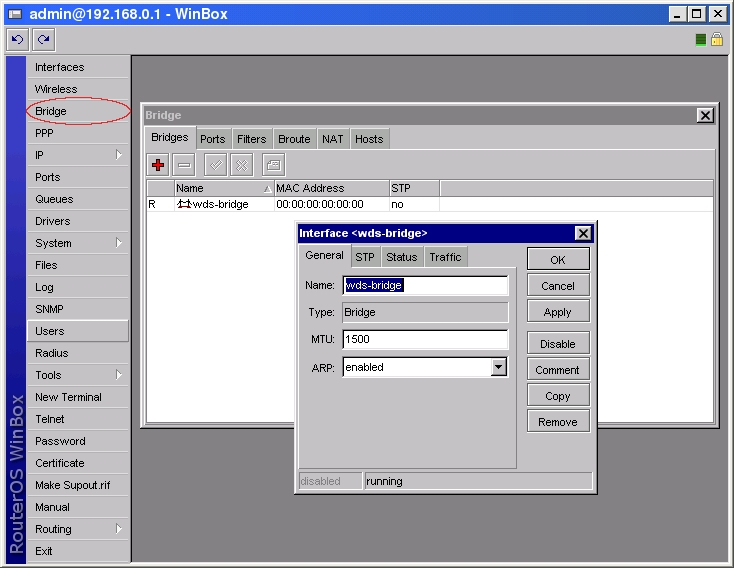
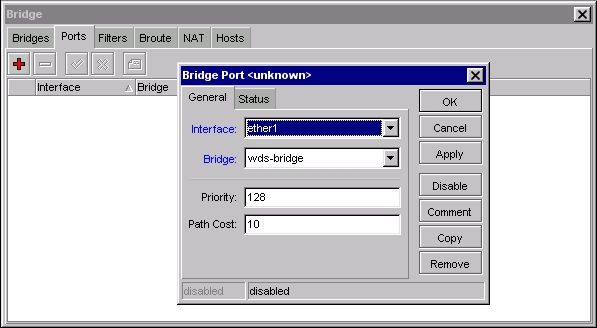
1. Create a bridge interface on AP and add ether1 interface to the bridge in WinBox
or in console
[admin@AP]> interface bridge add name=wds-bridge
[admin@AP]> interface bridge port add interface=ether1 bridge=wds-bridge
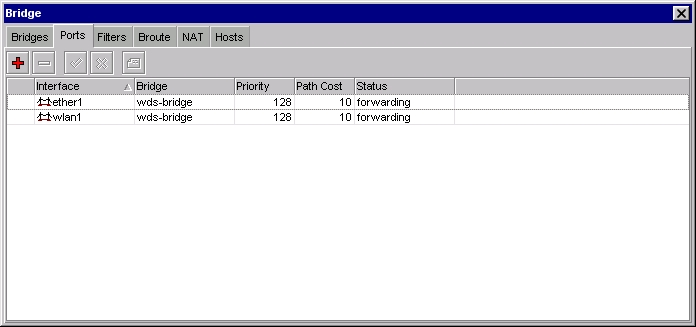
Do the same on the Station, and add ether1, wlan1 interfaces to the bridge in Winbox
or in console
[admin@Station]> interface bridge add name=wds-bridge
[admin@Station]> interface bridge port add interface=ether1 bridge=wds-bridge
[admin@Station]> interface bridge port add interface=wlan1 bridge=wds-bridge
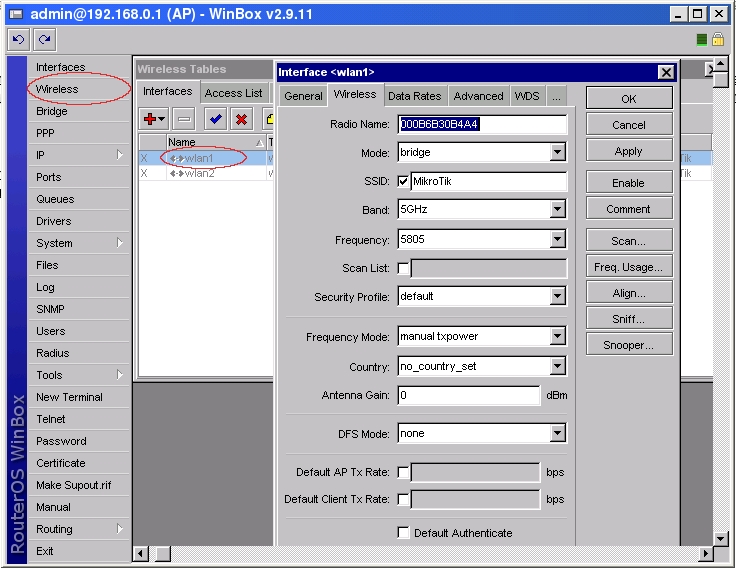
2. Make sure you have communication between MikroTik routers, i.e., one router is configured as server (AP), the other one as client (station). Configure wireless interface wlan1 on AP in WinBox
or in conslole
[admin@AP]> interface wireless set wlan1 ssid=MikroTik frequency=5805 mode=bridge disabled=no
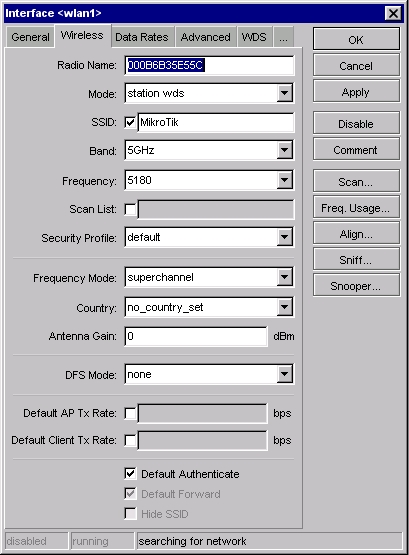
Do the same configuration on Client wireless interface (wlan1) in Winbox
or in console
[admin@Station] interface wireless set wlan1 mode=station-wds ssid=MikroTik disabled=no
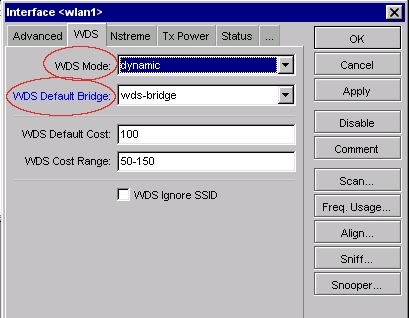
3. Create wds interface on AP and add the interface to the bridge in WinBox
or in console
[admin@AP] interface wireless set wlan1 wds-mode=dynamic wds-default-bridge=wds-bridge
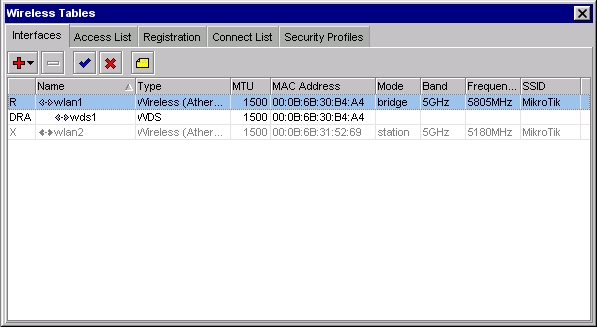
4. Check whether the WDS link is established in WinBox
or in console
[admin@AP] interface wireless wds> print
Flags: X - disabled, R - running, D - dynamic
0  RD name="wds1" mtu=1500 mac-address=00:0B:6B:30:B4:A4 arp=enabled
      disable-running-check=yes master-interface=wlan1
      wds-address=00:0B:6B:35:E5:5C
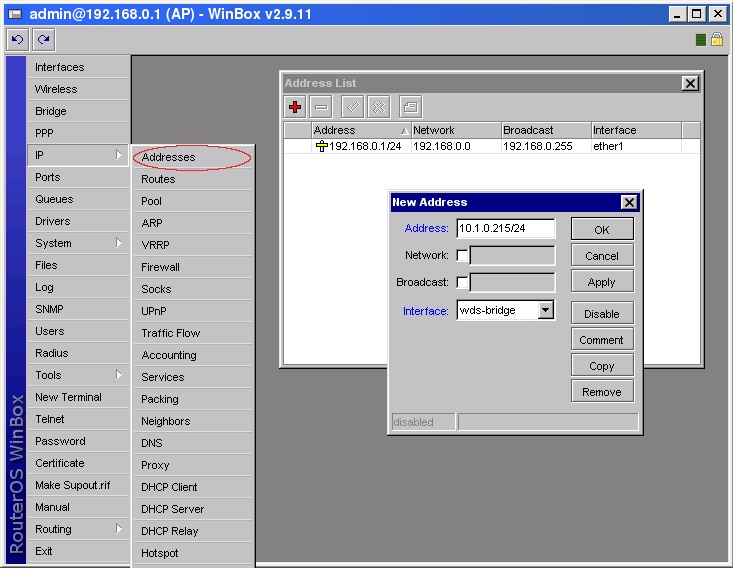
4. Add IP address on AP in WinBox
or in console
[admin@AP]> ip address add address=10.1.0.215/24 interface=wds-bridge
And on Station:
[admin@Station]> ip address add address=10.1.0.216/24 interface=wds-bridge
5. Test the bridge by pinging from 10.0.0.215 to 10.0.0.216. Note, that the bridge needs 10…30s to learn addresses and start passing through traffic.
NOTE: If not using NAT/MANGLE nor anything doing with conntrack, remember to turn of it at both link ends.
In the console:
[admin@xx]> ip firewall connection tracking set enabled=no
This will help you get the full bandwidth the wireless link can achive freeing the CPU load.
